
1. Lightsail 인스턴스 생성하면서 WordPress 설치하기
1. 운영체제, 및 설치 Apps 선택하기
Linux/Unix > Apps + OS > WordPress Multisizte를 선택해서 설치를 진행합니다.
2. 이름 설정하고 Instance 생성하기
기본 이름을 원하는 이름으로 편집합니다.

3. Instance 확인하기
Instances 항목에서 생성된 Instance를 확인합니다.
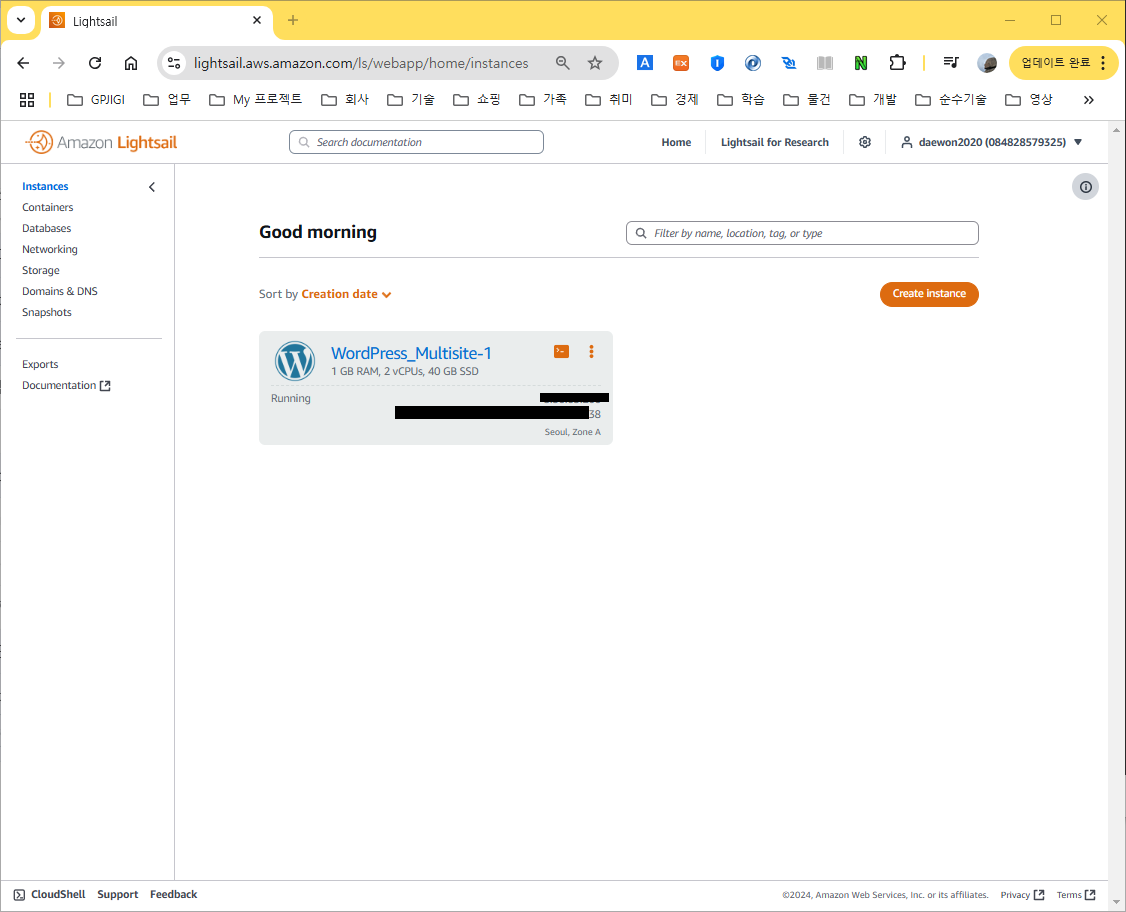
- Instance 정보의 ip address를 확인하고 domain 설정을 하세요.
certbot 인증서 생성 시 필요합니다.
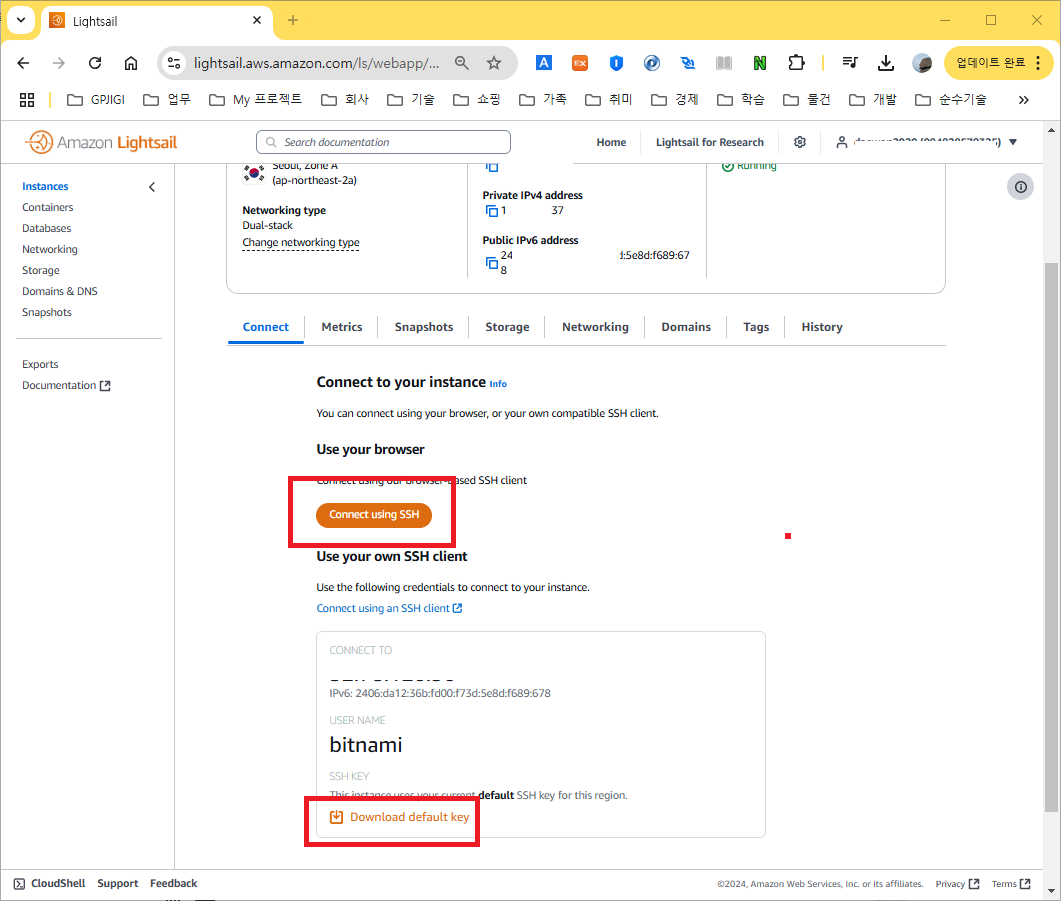
4. SSH 접속하기
"Download default key"를 통해서 SSH 접속시 사용할 파일을 다운로드 받습니다.
5. 비밀번호 확인하기
"bitnami_application_password" 파일에 미리 만들어진 비밀번호를 확인합니다. SSH 접속시 필요합니다.
cat bitnami_application_password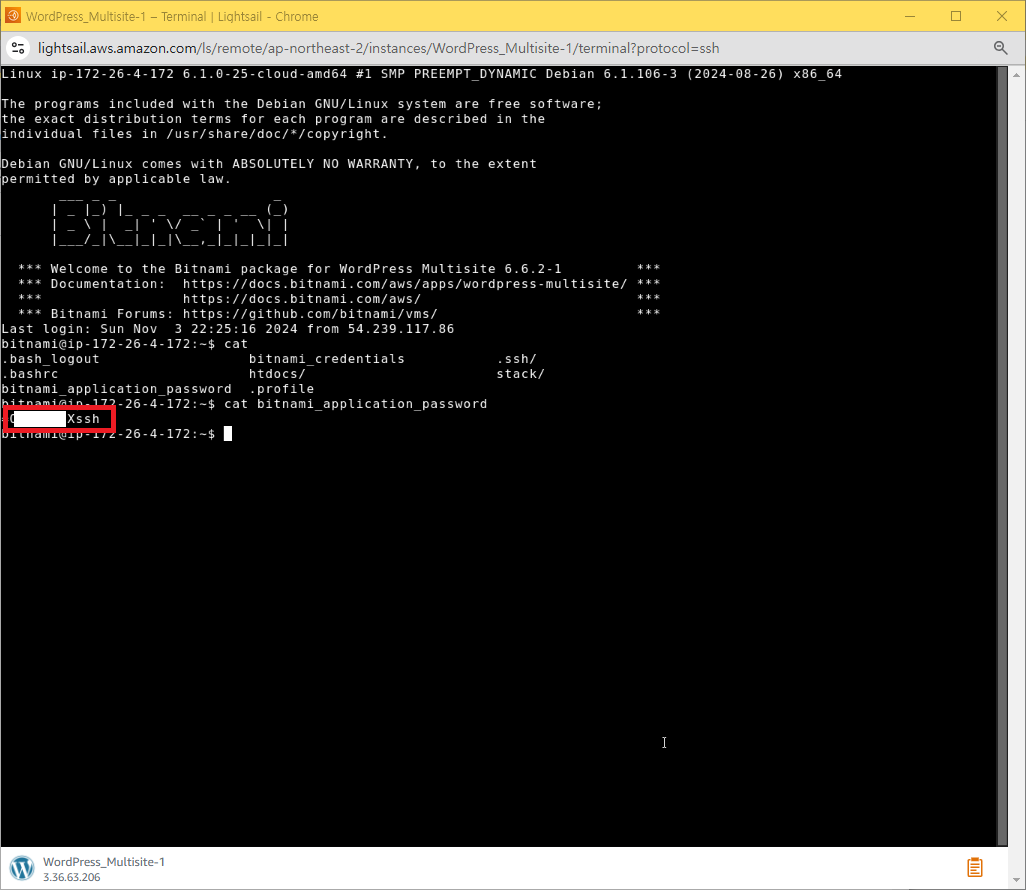
6. Domain 설정하기
- Domain이 있는 경우
sudo /opt/bitnami/configure_app_domain --domain example.com- Domain이 없는 경우
sudo /opt/bitnami/configure_app_domain --domain 192.168.0.100(your.ip.address)7. 로그인하기
"user" 이름은 기본으로 만들어져 있습니다. "5. 비밀번호 확인하기"에서 복사한 비밀번호를 입력하고 로그인 합니다.
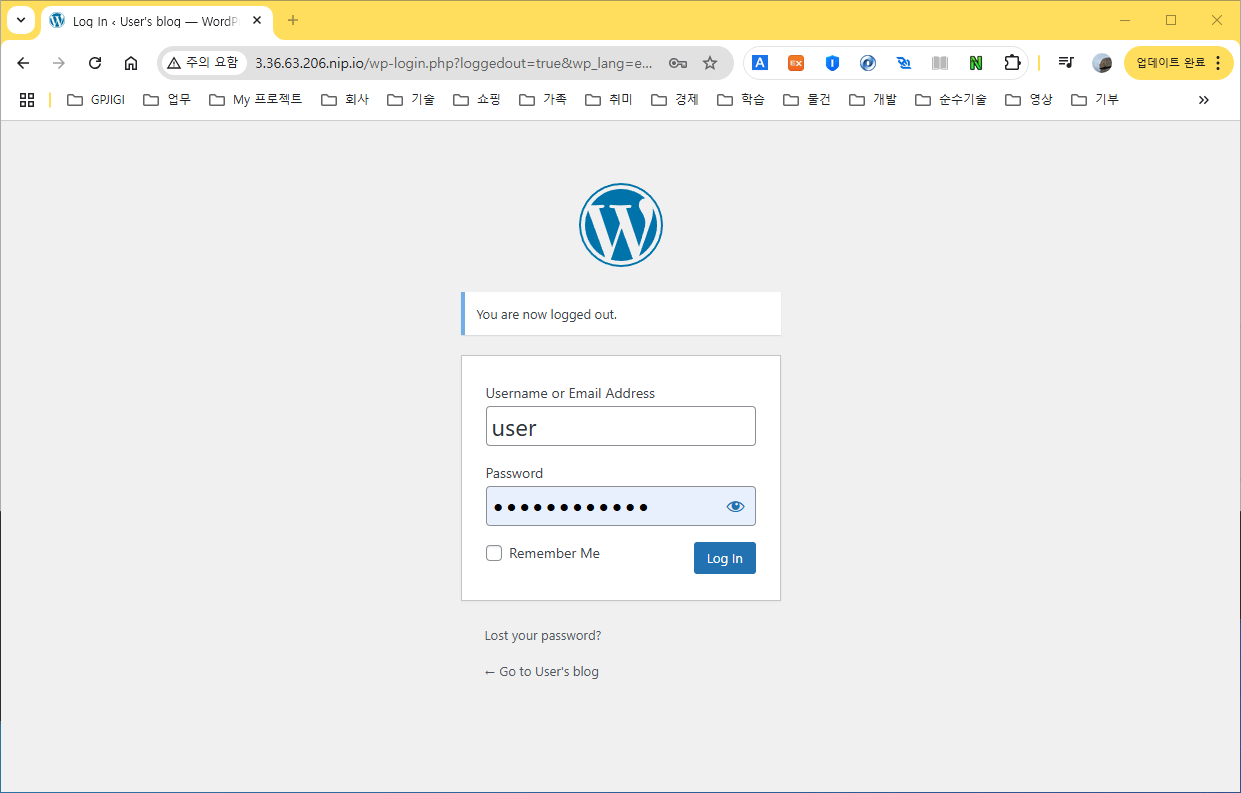
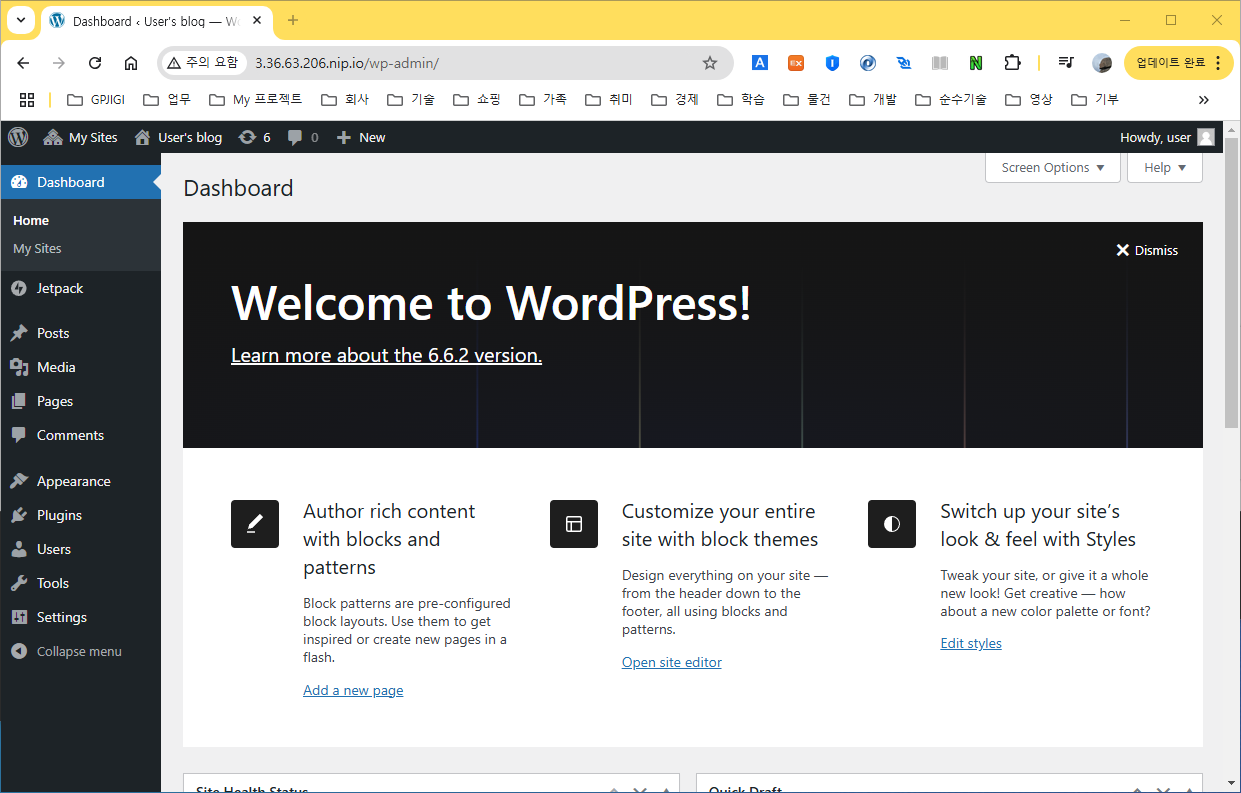
8. WordPress 확인하기
로그인 성공후 Dashboard로 이동후 확인합니다.
2. SSL 인증서 설정해서 Https로 서비스 하기
Bitnami WordPress에 SSL 인증서를 설치하려면, 다음 단계를 따르세요.
1. SSH로 서버에 접속
Bitnami가 설치된 서버에 SSH로 접속해야 합니다.
ssh -i your_private_key.pem bitnami@your_server_ip2. Certbot 설치
Let's Encrypt에서 무료 SSL 인증서를 발급받기 위해 Certbot을 설치합니다.
sudo apt-get update
sudo apt-get install certbot
3. SSL 인증서 발급
Certbot 명령어를 사용하여 SSL 인증서를 발급받습니다. yourdomain.com과 www.yourdomain.com을 도메인 이름으로 바꿔주세요.
여러개의 domain에 대한 인증서 일 경우 '-d' 옵션을 사용하여 추가하세요.
domain은 dns 서버에 미리 설정되어 있어야 합니다.
bitnami는 apache의 기본설정을 사용하지 않아 인증서를 먼저 생성하고 나중에 인증서를 설정합니다.
sudo certbot certonly --standalone -d yourdomain.com -d www.yourdomain.com명령어 실행 후 이메일 주소와 기타 정보를 입력하면 인증서가 발급됩니다.
4. Bitnami SSL 경로 설정
Bitnami WordPress 설치 경로에 SSL 인증서를 설정합니다.
생성된 인증서를 apache2/cnt/ 아래 생성하지 않고 letsencrypt/ 생성된 그대로 설정 파일에 설정해서 사용할 수 있습니다.
/opt/bitnami/apache/conf/bitnami/bitnami.conf 파일을 편집합니다.
/opt/bitnami/apache/conf/vhosts/wordpress-https-vhost.conf
수동으로 SSL 설정 추가하기
발급받은 인증서를 Bitnami Apache 구성 파일에 수동으로 추가해야 합니다.
- bitnami.conf 편집하기
   <VirtualHost *:443>
       ServerName yourdomain.com
       ServerAlias www.yourdomain.com
       DocumentRoot "/opt/bitnami/apache2/htdocs"

       SSLEngine on
       SSLCertificateFile "/etc/letsencrypt/live/yourdomain.com/fullchain.pem"
       SSLCertificateKeyFile "/etc/letsencrypt/live/yourdomain.com/privkey.pem"

       <Directory "/opt/bitnami/apache2/htdocs">
           AllowOverride All
       </Directory>
   </VirtualHost>
or /etc 아래 파일을 지접 접근하지 않게 하려면 bitnami 하위 디렉토리에 링크를 만들어 설정합니다.
   sudo ln -sf /etc/letsencrypt/live/yourdomain.com/fullchain.pem /opt/bitnami/apache2/conf/server.crt
   sudo ln -sf /etc/letsencrypt/live/yourdomain.com/privkey.pem /opt/bitnami/apache2/conf/server.key
Bitnami 스택에서 Certbot을 사용하여 인증서를 가져오는 과정에서 apache2ctl 명령을 사용할 때 "httpd가 동작하지 않는다"는 오류가 발생하는 주요 이유는, Bitnami 스택의 Apache 서버가 표준 경로에 설치된 것이 아니라 Bitnami 자체 디렉터리 구조를 사용하기 때문입니다. 즉, Bitnami는 자체 관리 스크립트 (ctlscript.sh)를 통해 Apache를 제어하며, 일반적인 시스템 명령인 apache2ctl을 사용하지 않습니다.
- wordpress-https-vhost.conf 편집하기
  <VirtualHost 127.0.0.1:443 _default_:443>
    ServerName www.example.com
    ServerAlias *
    SSLEngine on
    SSLCertificateFile "/etc/letsencrypt/live/gpjigi.com/fullchain.pem"
    SSLCertificateKeyFile "/etc/letsencrypt/live/gpjigi.com/privkey.pem"
    DocumentRoot /opt/bitnami/wordpress
    <Directory "/opt/bitnami/wordpress">
      Options -Indexes +FollowSymLinks -MultiViews
      AllowOverride None
      Require all granted
      # BEGIN WordPress fix for plugins and themes
      # Certain WordPress plugins and themes do not properly link to PHP files because of symbolic links
      # https://github.com/bitnami/bitnami-docker-wordpress-nginx/issues/43
      RewriteEngine On
      RewriteRule ^bitnami/wordpress(/.*) $1 [L]
      # END WordPress fix for plugins and themes
      # BEGIN nip.io redirection
      RewriteEngine On
      RewriteCond %{HTTP_HOST} ^([0-9]{1,3}\.[0-9]{1,3}\.[0-9]{1,3}\.[0-9]{1,3})(:[0-9]{1,5})?$
      RewriteRule ^/?(.*) %{REQUEST_SCHEME}://%1.nip.io%2/$1 [L,R=302,NE]
      # END nip.io redirection
      # BEGIN WordPress Multisite
      # Using subdomain network type: https://wordpress.org/support/article/htaccess/#multisite
      RewriteEngine On
      RewriteRule .* - [E=HTTP_AUTHORIZATION:%{HTTP:Authorization}]
      RewriteBase /
      RewriteRule ^index\.php$ - [L]
      # add a trailing slash to /wp-admin
      RewriteRule ^wp-admin$ wp-admin/ [R=301,L]
      RewriteCond %{REQUEST_FILENAME} -f [OR]
      RewriteCond %{REQUEST_FILENAME} -d
      RewriteRule ^ - [L]
      RewriteRule ^(wp-(content|admin|includes).*) $1 [L]
      RewriteRule ^(.*\.php)$ $1 [L]
      RewriteRule . index.php [L]
      # END WordPress Multisite
      # BEGIN Disable WordPress XML-RPC endpoint
      # Disable the outdated WordPress XML-RPC endpoint to prevent security vulnerabilities.
      # https://github.com/bitnami/containers/pull/51077
      <Files xmlrpc.php>
      Order Allow,Deny
      Deny from all
      </Files>
      # END Disable WordPress XML-RPC endpoint
    </Directory>
    Include "/opt/bitnami/apache/conf/vhosts/htaccess/wordpress-htaccess.conf"
  </VirtualHost>
5. Apache 재시작
Bitnami의 Apache 서버를 재시작하여 변경 사항을 반영합니다.
sudo /opt/bitnami/ctlscript.sh restart apache6. 자동 갱신 설정 (선택 사항)
Let's Encrypt 인증서는 90일 동안 유효합니다. 이를 자동 갱신하기 위해 cron job을 설정할 수 있습니다.
sudo crontab -e파일에 다음 줄을 추가하여 자동 갱신을 설정합니다.
0 0 * * * /usr/bin/certbot renew --quiet && sudo /opt/bitnami/ctlscript.sh restart apache이제 SSL 인증서가 자동으로 갱신되고, Apache 서버가 재시작되어 갱신된 인증서가 적용됩니다.